Skip to end of metadata
Go to start of metadata


Add Books

In order to issue books to the students, track and administrate the Library Book transactions, We have to first Add the Books in the software.


GO TO,

LIBRARY MANAGEMENT >> BOOKS


Upon clicking, Books, a Book Master page will be displayed as shown below.

Books can be added in the software in two ways.

  1. Add manually.
  2. Import books (by storing data in excel sheet & save worksheet in .CSV format).


Add Books manually

 
Click on ADD button to ADD the books manually.

Upon clicking ADD button a page will be displayed as shown below.

In Book Details Tab enter the following details of the Book,


  • Book ID - Book ID will be automatically generated.

  • Book Category - Select from the drop down list the category of the book.

  • ISBN NoEnter Book ISBN No.

  • Description - Enter a Description of book, if needed.

  • Book SubjectChoose the subject of the book, if any.

  • Edition No - Enter the book Edition, if any.

  • Bar-code ID - Generated automatically by the software.

  • Reference No. - Enter the book Reference No.

  • Title - Enter the Title of the book.

  • Language - Enter the language in which book is published.

  • Book Status - Choose from the drop down list the status of the book.

  • Location - Enter the location where the book is stored in the Library.

  • Author1 - Enter the Author of the book.

  • Author2, Author3 - Some books might have multiple Authors, in that case we can use this.

  • Publisher - Enter the Book Publisher Name.

  • Accession No - Enter the Accession Number of the book.

  • Publisher Year - Enter the Year in which the book was published.

  • Is Reference - Check box is reference if the book is only for reference purpose and for issuing.
     

Reference Books cannot be issued to any student. It is meant to be read in Library only.                                                                                                                      


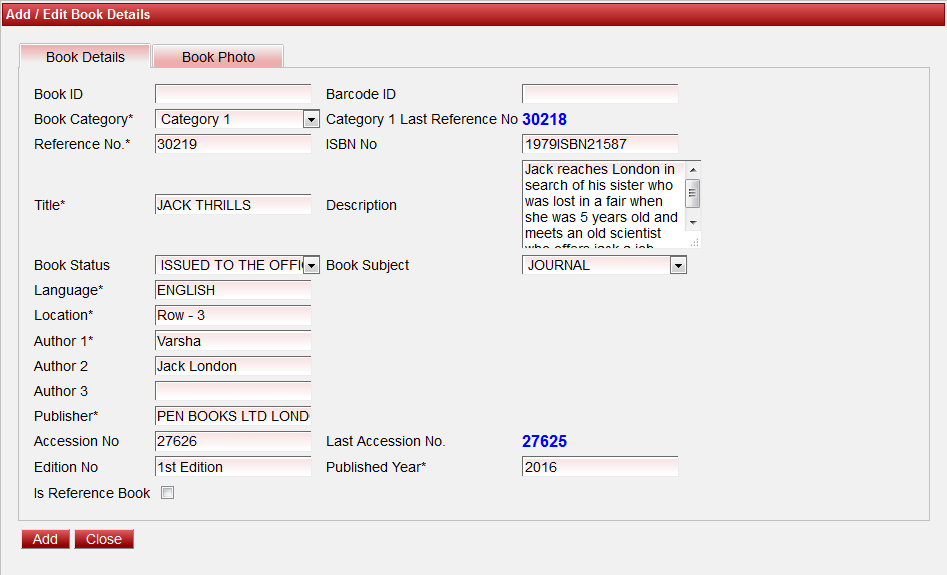
Book Category, Subject, Status, Locations, Authors, Publishers will appear in the drop down list only if it's already created.

 We can Add photo of the book in Book Photo Tab as shown below.

Go to Book Photo Tab

  • Click on Add button.
  • Browse and choose the image of the book.
  • Click on Upload button.
  • Finally, click on Add button to ADD the book.


Upon Clicking ADD a success message will be displayed as shown below indicating the book is saved / added in the software.

Similarly, any number of Books can be added in the software.


Labels
  • None