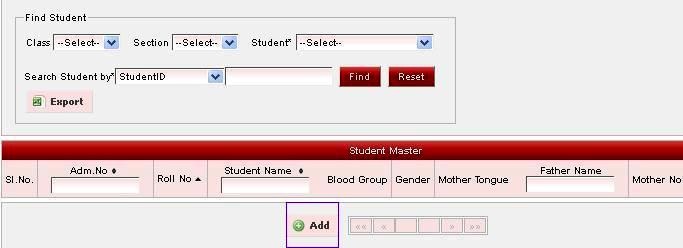
1. To add the student details in software for that firstly create the class, section, subjects and Class subjects in Masters Menu.Here class-?section?subjects?Class subjects interrelated one another. 2. After creating class, section, subjects and Class subjects in Masters menu go to Student information in that click on students menu. Find student task bar menu will display here click on Add button. 
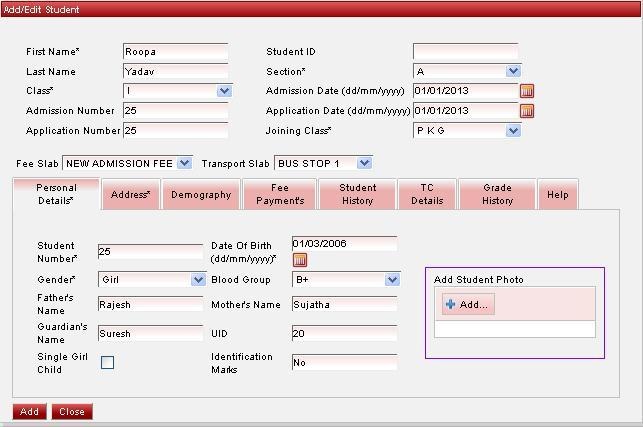
3. Enter student information like first name class, section, joining class and for personal information. Enter the details in personal details, Address demography tab.student History and TC details tab used for TC certificate generation for students who left the school.Grade history tab is automatically updated when we click on to add button. Fee payment tab is also automatically updated when fee payment is done for that student. To get the student photo to student ID card upload the photo in personal details tab add student photo menu display in right side corner. 
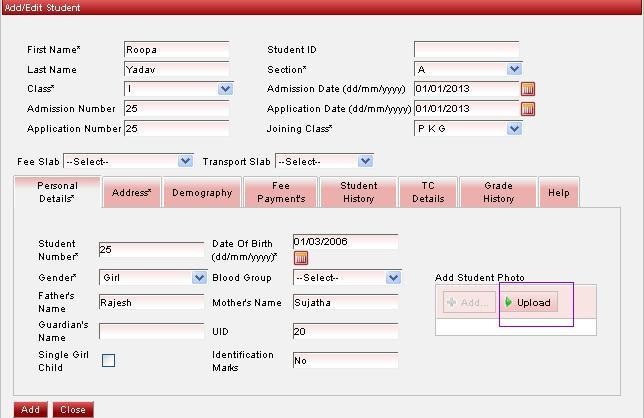
4. Click on to ADD button it acts like browse button to upload the photo.select the .jpg format photo of the student stored in your system. Click on upload button in Add Student Photo. 
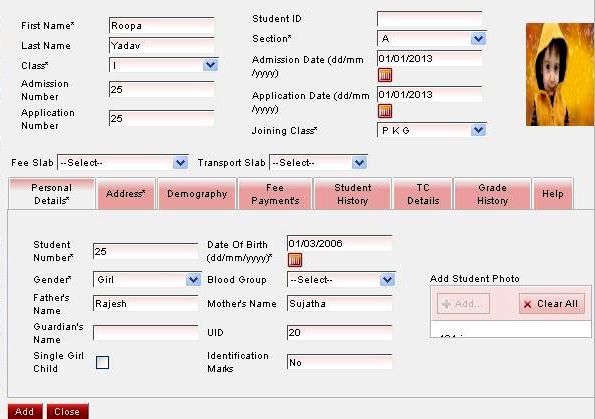
5. It upload the photo. 
Then click on add save student the student is added in Class I and section A along photo. 6. Other way to upload the photo through Photo Manager Option in widgets menu but this needs web cam to take the photo of the student. Connect web camara to computer then and install Adobe flash Player software which you can freely download from internet  Image Added Image Added
Click on to student photo in Photo Manager of SchoolAdmin software. Select the class section and that student name to take photo. Click on configure to configure the photo size,Click on Take Snapshot button and then click on to Upload button it upload the photo to that student. Click on to Save That means photo is saved in that class section and student name.  Image Added Image Added
|