Versions Compared

Key

  • This line was added.
  • This line was removed.
  • Formatting was changed.
Excerpt
Section

Step 1: Goto Masters , Click on Caste menu

Column

Column
width30%

Declaration of Caste is required to specify for which caste the student belongs to. We can get a report of students with respect to the Caste / Caste category which is included in higher version of School Admin.

Column
width60%


Section

Step 2: Once you click on Caste menu in the masters, Caste master will be opened as shown below.

click on Add button to add new caste . In the caste table it will show all the castes previously created.

Section

Step 3: Once you click on  (plus) Add,  Add/Edit Caste window will be shown as below


Column
width30%

Column

In the Add / Edit caste category dialog, you need to provide the details as show in the screen.

Caste name is the name of the caste. Example : Lingayat, Brahmin , Christian , Muslim ,SC etc.,

Caste Description is the details of that particular caste , which is not mandatory to give details.

Caste Category Is the category to which the caste belongs to.


Info

If the user does not know the caste category, they can create a dummy caste category say NA

Image Added

Section

Finally, Click on Add button to create a caste . Once the data is saved you will see a Caste Successfully added message. Repeat the above steps to add all the castes in your School. Once all the castes are added click on Close button to close the Add/Edit window.

Section

The Caste Master will look as shown below.

Edit or Delete a record

You can edit and change the added record by clicking on Edit icon in Action column.

You can delete the record if created duplicated or not required by clicking on delete icon
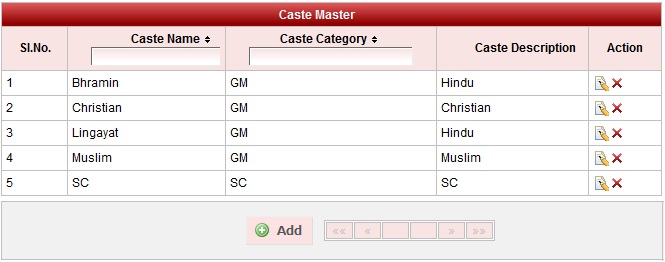
   in Action column.

Excerpt

Excerpt Include
How to Edit or Delete a record
nopaneltrue