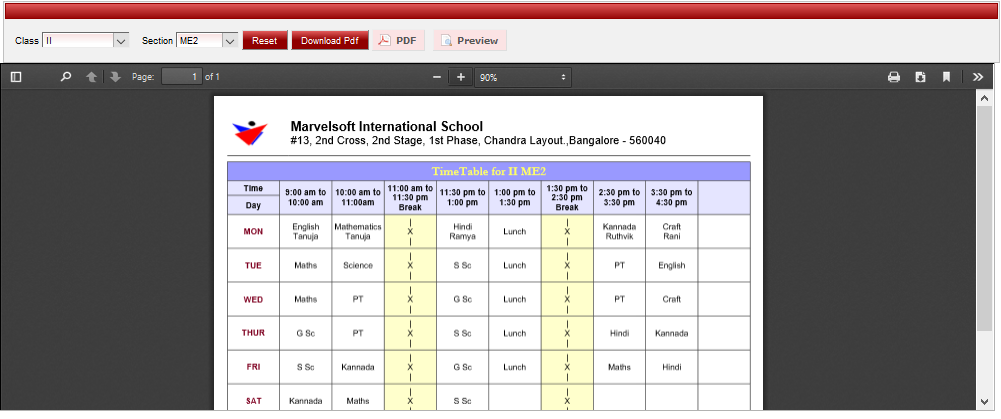
Time Table menu is a simple module where the institution can define the time table for the academic year and generate report to display on notice board.
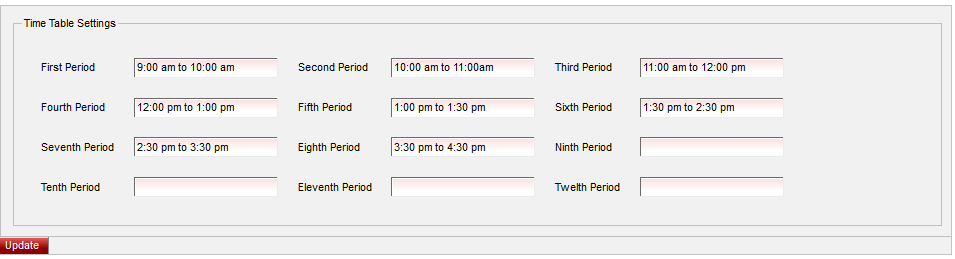
Step 1: Goto Options --> Click on Settings -->Click on Default Settings,
Enter the period timings in the settings, this will be a global settings applicable for whole school.
Click on Update button, the Setting Updated Successfully message will be displayed.
Step 2: Once the setting is updated, go to Student Information --> Time Table menu.
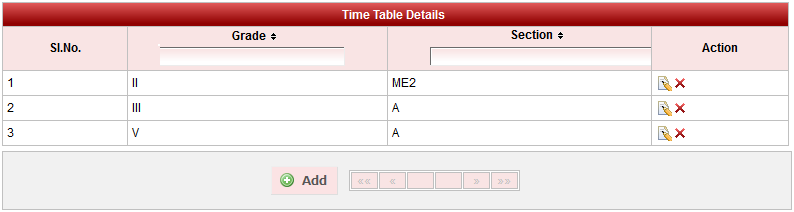
click on Add button to add Time Table for all the classes. In the table it will show all the Time table previously created.
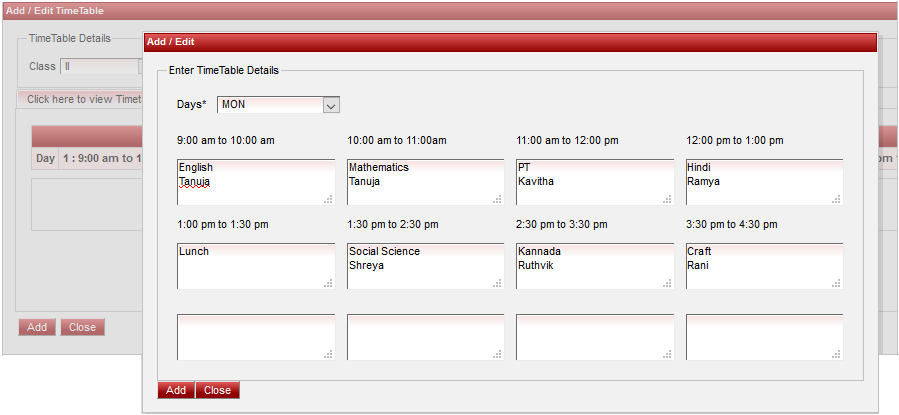
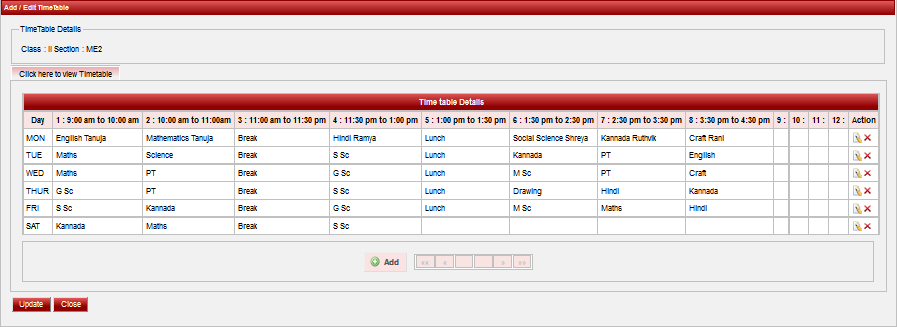
Step 3: Once you click on Add, Add/Edit Time Table window will be shown as below
In the Add / Edit Time Table Details dialog, you need to provide the details as show in the screen.
Select Class and Section.
Click on inner Add button to add the time table for each day of the week . Click on add as and when the respective days time table details is entered.
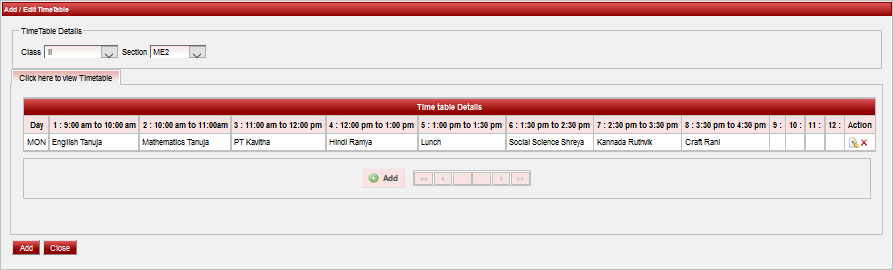
Finally, Click on Add button to create a Timetable . Once the data is saved you will see a Timetable Successfully added message. Repeat the above steps to add all the Timetable in your School. Once all the Timetable are added click on Close button to close the Add/Edit window.
The Timetable Master will look as shown below.
Edit or Delete a record
You can edit and change the added record by clicking on Edit icon in Action column.
You can delete the record if created duplicated or not required by clicking on delete icon in Action column.
 in Action column.
 in Action column.