Skip to end of metadata
Go to start of metadata


How to Add Student?

The students details can be stored in the Students module in Student Information Menu.


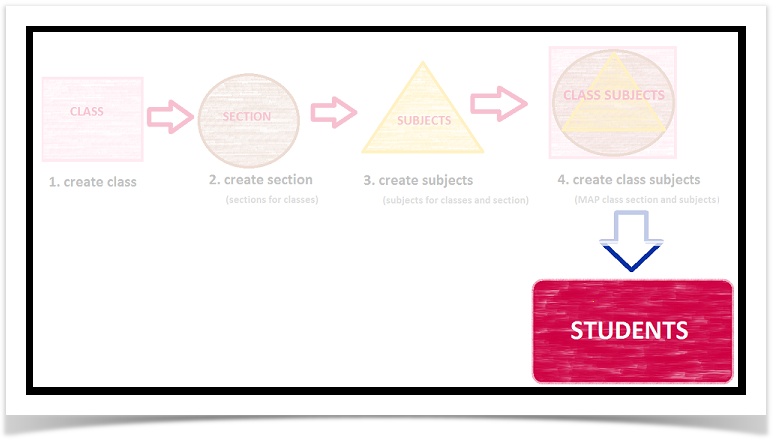
Even before we Add any student in the software, it is required to create class, section, subjects and class subjects.                                                                     

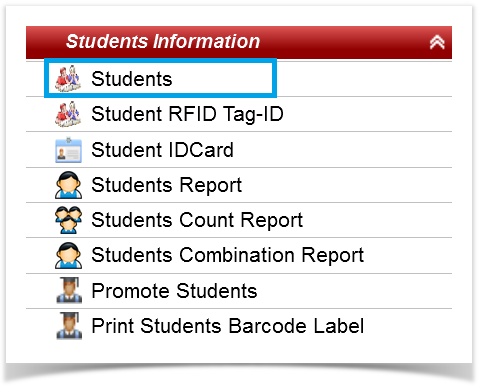
Go to,

  • STUDENT INFORMATION >> STUDENTS

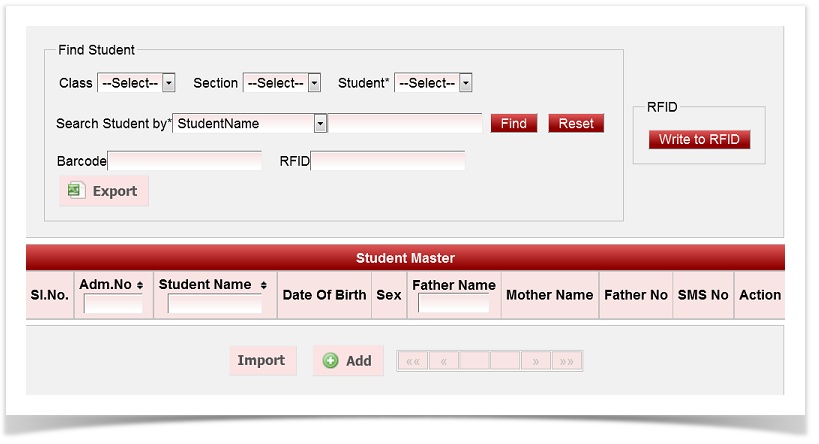
Upon clicking Students a page will be displayed as shown below.

Click on ADD button to Add a caste.

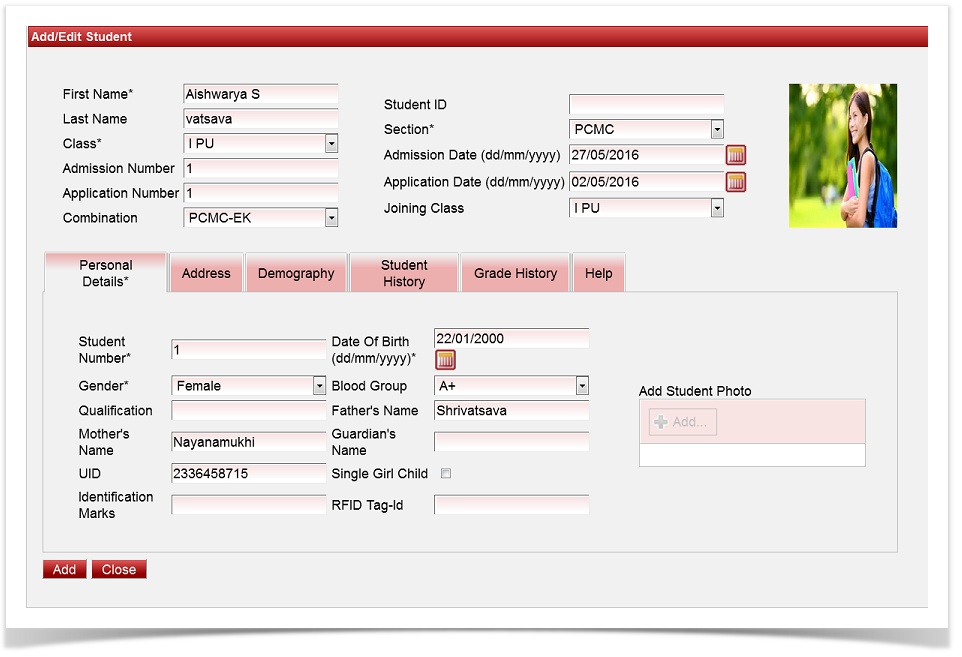
Upon clicking ADD button Add/Edit Student dialog box will be displayed as shown below.


  • Enter all the basic details of the student
  • First enter all the mandatory information like First Name, Last Name, Section, Joining Class.
  • Also enter other details of the student like Admission Number, Application Number, select Combination, Admission Date, Application Date.
  • Student ID will be automatically generated by the software.

Fields with ' * ' mark are mandatory fields.                                                                                           

PERSONAL DETAILS:


  • Enter mandatory fields Student Number, Date Of Birth and select Gender.
  • If Available, enter Qualification, Father's Name, Mother's Name, Guardian's Name, UID, Identification Marks and select the Blood Group.
  • RFID Tag ID will be reflected automatically in students if RFID Tag ID is assigned to the student in RFID Tag ID module.
  • To Add Student Photo - Click on Add button under Add Student Photo.
  • If the student is a single girl child, check box Single Girl Child.

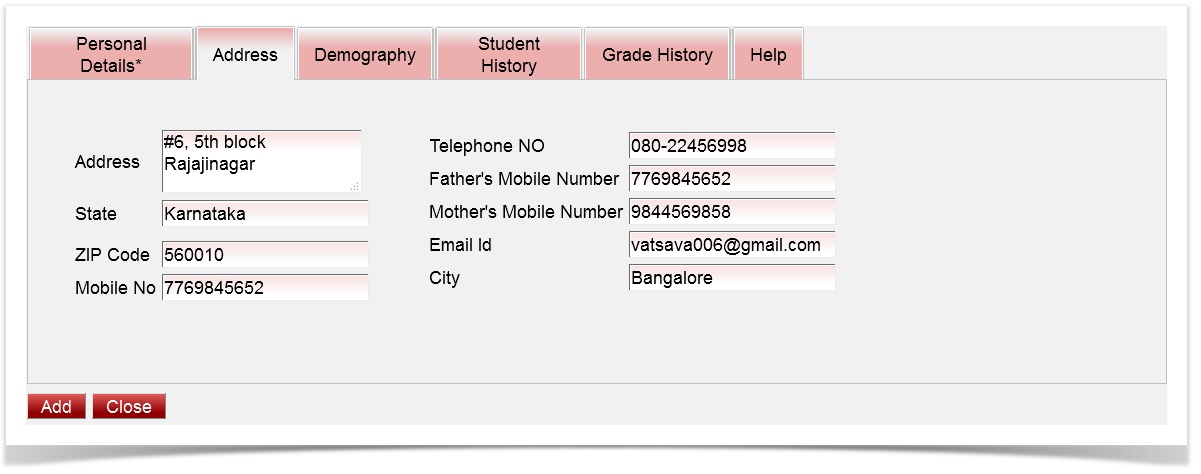
ADDRESS

  • Enter all the ADDRESS details.

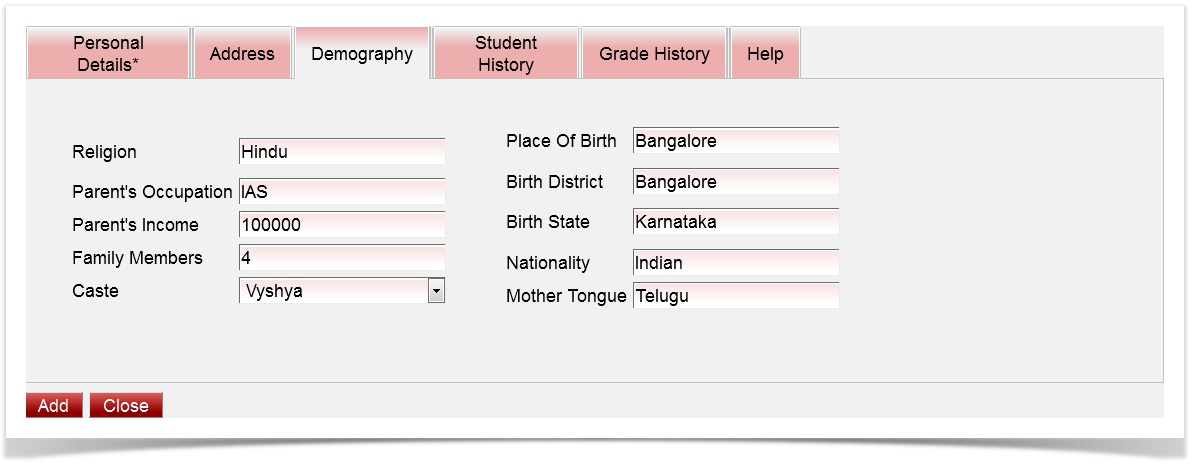
Demography

  •  Enter the social statistic details of the student such as Religion, Parent's Occupation, Parent's Income, Family Members, Place Of Birth, Birth District, Birth State, Nationality, Mother Tongue.
  • Select Caste from the drop down list.

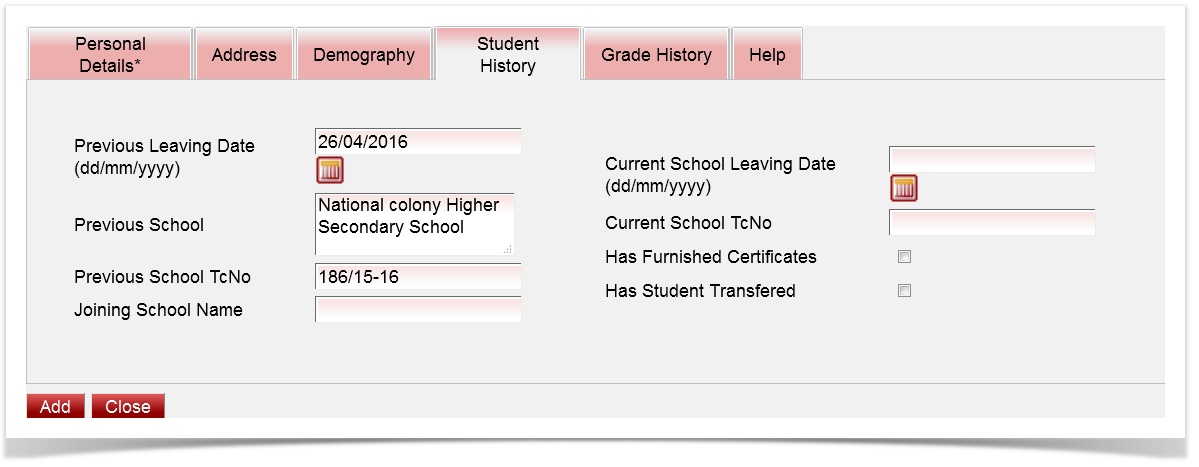
Student History

  •  Enter the Student History Details if available.

Grade History gets created when we promote student to the next Academic Year.

               Once after entering the mandatory details and required / available details, Finally click on Add button to Add the Student.

               Upon clicking Add a success message will be displayed as shown below confirming that the student data is stored by the software.


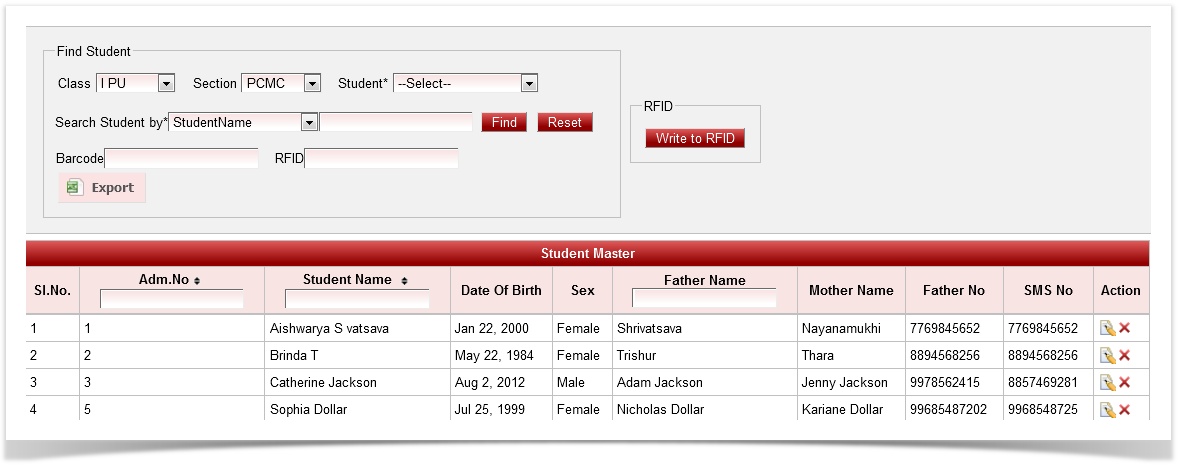
      How to search a particular student?

  • Select Class and section.
  •  Click on Student drop down list. 
  • Select the student Name.

        How to view all the students in a particular class and section?

  • Select Class and section.
  • Click on Find button.

          All the students in the selected class and section will be displayed.

Similarly any number of Students can be Added in various classes.

Click on the edit button  to add or edit any student information and click on update button top save the changes.                                                                       


Labels
  • None