Skip to end of metadata
Go to start of metadata

Step 1: Goto Masters , Click on Class menu

Declaration of class is required to specify number of classes present in the school.

To Add Students in  a Virtual Class (Class Subjects), You must first create a class to create Class Subject. Once you create a class then you can add section into respective classes.

Step 2: Once you click on Class menu in the masters, class master will be opened as shown below.

click on Add button to add new class. In the class table it will show all the classes previously created.


Step 3: Once you click on  (plus) Add,  Add/Edit Class window will be shown as below


In the Add / Edit class dialog, you need to provide the details as show in the screen.

Class is the Name of the class, for example for LKG, UKG, I-STD, II-STD etc.,

Weight indicates the level of the class which will be used by the software for its internal uses. for example if there are 10 - classes in a School, lowest class will have the Weight as 1 and the highest class will have the weight value as 10. This helps to display class in an order.

Strength value will be used in the Higher versions of SchoolAdmin. In the Lite Edition you can give any value of your choice say 50. This value is not used in SchoolAdmin Lite Edition.

Finally, Click on Add button to create a class. Once the data is saved you will see a Class Successfully added message. Repeat the above steps to add all the Classes in your School. Once all the classes are added click on Close button to close the Add/Edit window.

The Class Master will look as shown below.

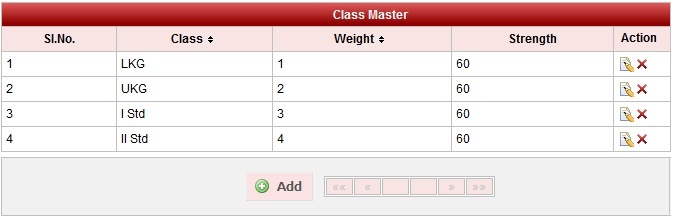
Edit or Delete a record

You can edit and change the added record by clicking on Edit icon in Action column.

You can delete the record if created duplicated or not required by clicking on delete icon   in Action column.


Labels
  • None