Step1:Configer Printer
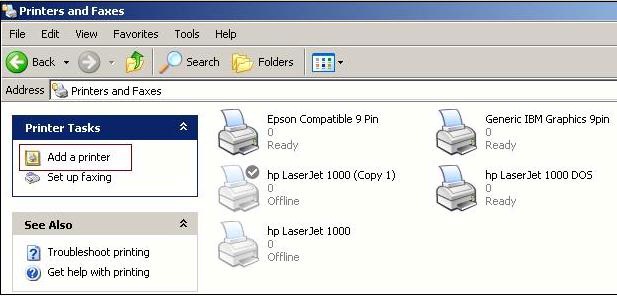
Goto Start->Control Panel->Printer and Faxes->Click on Add a Printer.
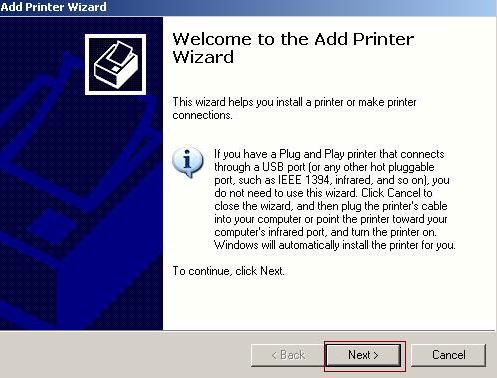
Click on next button
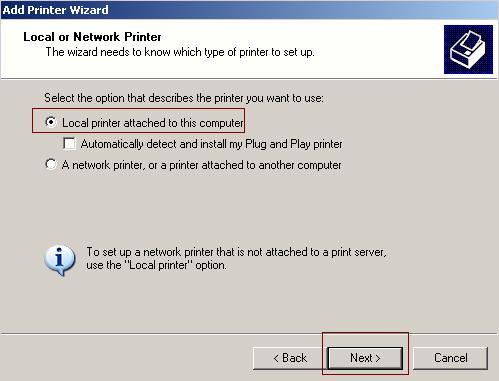
Select local printer attached to this computer (already installed printer) and click on Next button
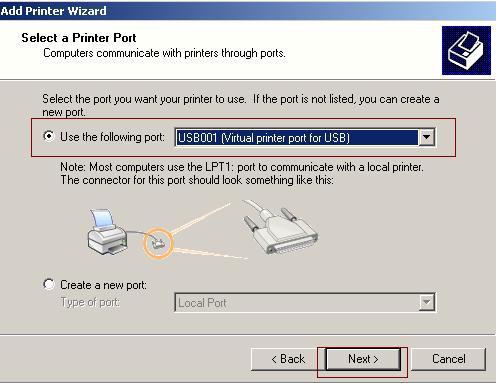
Select printer port ,if printer contain USB port select USB001(Virtual printer port for USB) otherwise
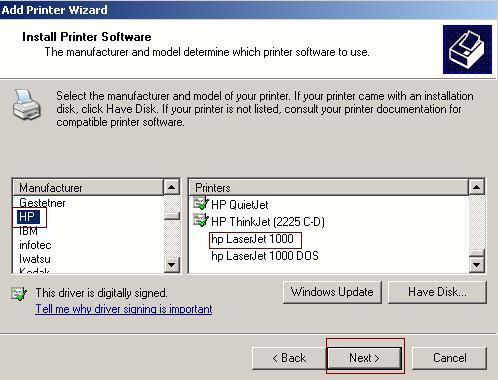
Select the manufacturer and model of your printer then click on next.
A driver is already installed for this computer.you can use same driver. Select keep existing driver (recommended) then click on next.

Type a name for this Printer, in this case printer name is Receipt Printer. Make the printer as default by selecting Yes.
|