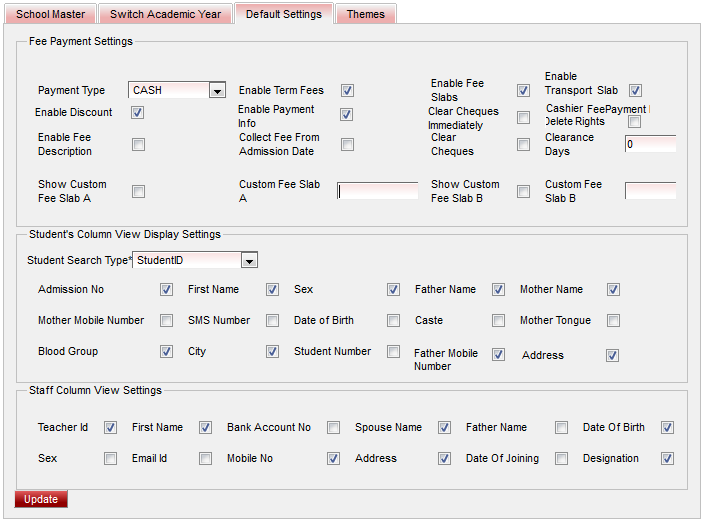
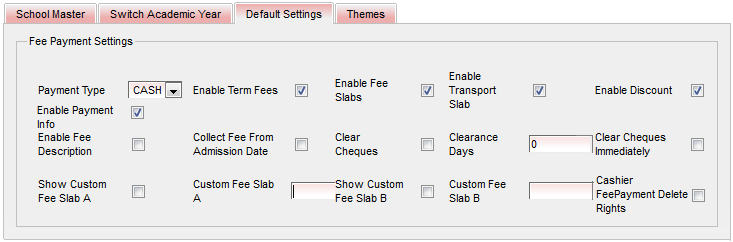
| Suggestion Set the payment type depending on which form the payment is done on maximum basis. This helps you not to change payment type repeatedly in Admin Master -- Fee payment -- Payment Type |
- Enable Term Fees - User can enable Terms Fees if they collect Term Fee from students. By enabling Term Fees will enable number term check box which you have defined in Switch academic year.. The term check box will be visible in
1. Fee Amount while defining Term fee amount.
2. In Fee payment while doing term payment.
- Enable Fee Slabs - If the user wants define fee structure on grouping students wrt fee slab. They have to enable fee slab which enables the fee slab list in
1. Fee Group for assigning fee slab to fee group.
2. Students for assigning the fee slab for which the student belongs to individually.
3. Student Slab for assigning the fee slab for which the student belongs to wrt class. - Enable Transport Slab - If the user wants define fee structure of transport fee on grouping students wrt transport slab. They have to enable transport slab which enables the transport slab list in
1. Fee Group for assigning fee slab to fee group.
2. Students for assigning the transport slab for which the student belongs to individually.
3. Student Slab for assigning the transport slab for which the student belongs to wrt class .
4. For Staff to know in which school bus the staff comes to school. - Enable Discount - enable discount only if you have discount payment on annual fee in your school. enabling discount enables discount input where the user can give discount on annual fee for the student.
1.Discount field is visible in Admin Master - Fee Payment. - Enable Payment Info - enabling payment info enables input text Payment information in
1. Admin Master - Fee Payment.
2. Payment info column in Admin Master - Fee payment Details - Fee payment details table.
This helps the user to enter any information related to the fee payment. Like the bank name , cheque/DD/NEFT number if the payment is done by cheque/DD/NEFT. Therefore you can get this payment info when you export the fee payment details report (Admin Master - Fee Payment Details - Export). This will be useful for any verification. - Enable Fee Description - enabling fee description enables column in Admin Master - Fee payment Details - Fee Payment Details table. This helps the user to enter any information related to the fee payment. Therefore you can get this fee description when you export the fee payment details report (Admin Master - Fee Payment Details - Export). This will be useful for any verification.
- Collection from Admission Date - User can collect the fee of student's from the date of admission, means the fee months which are passed before admission date will be excluded for those months the student need not pay the fee, this is enabled only if you collect the fee from date of admission. Irrespective of admission date of the student if your school collects all the months fee then collection from admission date must not be enabled.
- Clear Cheques & Clearance Days - We have menu in Admin Master - Fee Payment Reconcile where user has to reconcile the cheque payments depending on whether they are cleared or bounced. If the user wants to set cleared status for all the cheque payment by School Admin Lite, user can do this by enabling the Clear Cheque and entering the number of days within the cheques has to be cleared (Note : User has to be sure that all the cheques will be cleared , if in case any cheque is bounced, then you need to go to Admin Master - Fee Payment Reconcile and change the status and update).
- Clear Cheques Immediately - We have menu in Admin Master - Fee Payment Reconcile where user has to reconcile the cheque payments depending on whether they are cleared or bounced. If the user wants to set cleared status for all the cheque payment by School Admin Lite immediately after the cheque payment , user can do this by enabling the Clear Cheque Immediately
(Note : User has to be sure that all the cheques will be cleared , if in case any cheque is bounced, then you need to go to Admin Master - Fee Payment Reconcile and change the status and update). - Cashier FeePayment Delete Rights - If you want to give rights for User having cashier role authority to delete the fee payment in Admin Master - FeePayment Details, you need to enable Cashier FeePayment Delete Rights.
- Show Custom Fee Slab A & Custom Fee Slab A- If user wants to define fee structure for students with respect to slab other than fee and transport slab, they can enable show custom fee slab A. And they can enter the name for the slab in Custom Fee Slab A. This will be visible in
1. Fee Group for assigning Custom Fee Slab A to fee group.
2. Students for assigning the Custom Fee Slab A for which the student belongs to individually.
3. Student Slab for assigning the Custom Fee Slab A for which the student belongs to wrt class. - Show Custum Fee Slab B & Custom Fee Slab B - If user wants to define fee structure for students with respect to slab other than fee and transport slab, they can enable show custom fee slab B. And they can enter the name for the slab in Custom Fee Slab B. This will be visible in
1. Fee Group for assigning Custom Fee Slab A to fee group.
2. Students for assigning the Custom Fee Slab A for which the student belongs to individually.
3. Student Slab for assigning the Custom Fee Slab A for which the student belongs to wrt class.

Labels